Hacking the POGOplug. The definitive guide in progress. [PT1]
[Pt1]
GOAL:
To setup from beginning to end a personalized Pogoplug server. Installation of Arch Linux, with addition of Apache, PHP, MySQL and whatever else we may decide upon.
THINGS YOU WILL NEED:
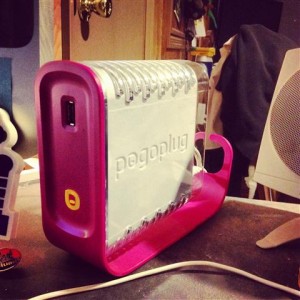
- Pogoplug v2 (Pink/Gray)
- 2gb+ Clean flashdrive or external hard drive
- Mac Terminal or Windows Terminal Program (I like PuTTY)
- Basic Linux knowledge and the ability to follow a manual 😛
- Install time. (This varies greatly, but figure about 45 min for a Linux veteran, maybe about 90+ for novices. Depending on what it is you would like to do, configuring this beast could take hours or days..)
** NOTE **
Following this guide will void your manufacturer’s warranty, and will lead to very little official support in the event of imminent failure. Do not blame me if you mess something up as I assume no responsibility for what you do with this guide. With that being said.
Preface:
Intro to the Pogoplug
Recently I have taken a keen liking to a little pink web device, the Pogoplug. When I first read about the Pogoplug, the concept sounded very intriguing. The ability to run your own cloud server from the home seemed like an excellent idea. Kick in the ability to hack and run Linux? That would be awesome! I was sold. I had to have one.
I browsed around for a good deal, as I was on a limited budget. I found a friend that was selling his device, he didn’t want it and parted with it cheap. A Pogoplug Pink v2! Let the hacking begin!
Upon first boot, everything appeared to go well. I plugged it in, and shortly after the device was fully illuminated and ready to go. I attempted to access it with the Pogoplug software, but found that I could not. There was a big problem. These devices are tied to users Pogoplug accounts by the serial numbers, so if a user does not unregister the device, you cannot do much with it; however I did read that in some cases customer support can grant you access to a device.

In my case it was not that bad. I contacted my friend, he removed it from his account, and it was good to go.
** HINT **
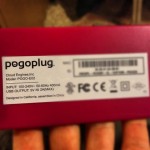
It would be to write down your MAC address, which is located under the bar-code on the bottom of the device. Next, log into your routers administrative page. You should be able to find a section of your routers configuration services, that allow you to set static leases. You would want to set a static lease on a headless setup like this, so that you always know at what address you can access your Pogoplug.
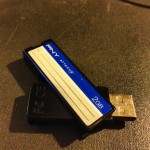
Have the USB device that you plan to install to handy. I am using just some old drive that I had laying around. 2 GB PNY. Nothing special.
Be aware that anything on the drive is going to be erased during the setup process, so make sure to back it up.
** NOTE **
This setup guide is only for (PogoPlug v2)
Similar setup guides for this and OTHER compatible devices can be found HERE.
Step 1:
Prepare your Pogoplug
First with the device on and online, remove all of the attached devices. Attempt to SSH to the IP of the device set by the DHCP. If you are unable to SSH, register and enable SSH through my.pogoplug.com. The default login (unless changed through my.pogoplug.com) is root/ceadmin.
Once you are able to connect via SSH make sure you stop the Pogoplug software before continuing.
killall hbwd
You will only need to do this once as the Pogoplug software will be disabled later in the install
While connected to your Pogoplug, run these commands to download the bootloader that enables booting from USB drives.
cd /tmp
wget http://joepetruska.com/pogoplug/install_uboot_mtd0.sh chmod +x install_uboot_mtd0.sh ./install_uboot_mtd0.sh
chmod +x install_uboot_mtd0.sh
./install_uboot_mtd0.sh
After the bootloader finishes downloading, insert the USB drive you intend to use EVERYTHING WILL BE ERASED.
Insert the drive into either the front, or the top back USB port.
You will now run fdisk to partition the drive.
Step 2:
Fdisk
Fdisk will partition your USB flash or hard drive for use by Arch
/sbin/fdisk /dev/sda
fdisk will delete your old partitions
o ## this will remove all partitions
p ## lists any partitions
Now we will make the new partitions
n ##first
p ##second
1 ##third
Press ‘enter’ to continue with defaults.
Exit by pressing ‘w’
Here we create the ext2 filesystem
wget http://archlinuxarm.org/os/pogoplug/mke2fs
chmod 755 mke2fs
./mke2fs /dev/sda1
mkdir usb
mount /dev/sda1 usb
Step 3:
Installing Arch Linux
Now we will download and install Arch Linux
cd usb
wget http://archlinuxarm.org/os/ArchLinuxARM-armv5te-latest.tar.gz
tar -xzvf ArchLinuxARM-armv5te-*.tar.gz ## This will take some time
rm ArchLinuxARM-armv5te-*.tar.gz
sync ## Flash drives take longer
Now we will clean up and reboot.
cd ..
umount usb
/sbin/reboot
If you are running this process from a MAC or Linux machine, your SSH key will be different, and need to be cleared out, to do this run the following
ssh-keygen -R 192.168.1.123 ## Your Pogoplug IP
Log back in after your Pogoplug reboots using username:: root and password:: root.
Congratulations, you just installed ArchLinux onto your new Pogoplug. Before we finish there are a few things we should do.
Step 4:
Change Your Root Password
This is something should be done ASAP. It is very easy just run the following command and follow the prompts:
passwd root ## change user password
Make sure not to forget your root password, as you will use this to login from now on.
** Basic Commands **
reboot ## reboots Pogoplug
poweroff ## shuts down Pogoplug to be unplugged
These commands should be used for exactly what they imply. Try not to unplug your Pogoplug while it is running, this could potentially damage your install.
A short repair guide is in the works, so if you have an issue with not booting post it in the comments.
Next time we will take a closer look at some applications to update and install, and start to lay the groundwork for your web-server!
Please let me know of any questions that you may have!
If I helped you out consider buying me a beer 😛


i don’t understand your line of thought. could you make it clearer please?
Yes, what is it that you are having difficulty with? It would be my pleasure to help you out!
everything is very open and very clear explanation of issues. it contains truly information. your website is very useful. thanks for sharing. looking forward to more
nice website.
Hi my friend! I wish to say that this post is awesome, nice written and include almost all vital infos. I would like to look extra posts like this .
Hi there, I found your site by way of Google whilst searching for a comparable matter, your web site got here up, it appears good. I have added to favourites|added to my bookmarks.
I love the way you wrote this article. This is wonderful. I do hope you intend to write more of these types of articles. Thank you for this interesting content!
Hello my loved one! I wish to say that this post is amazing, great written and include approximately all vital infos. I’d like to look extra posts like this .
The information described within the posting are
many with the ideal accessible
Its like you read my mind! You seem to know so much about this,
like you wrote the book in it or something. I think that you
could do with some pics to drive the message
home a little bit, but instead of that, this is great blog.
A fantastic read. I’ll definitely be back.
From a summer months regarding showing off venture and all the interruptions, at this point all of us have to travel “back for you to school” and acquire i’ll carry on with the hard work.
I just want to say I’m very new to weblog and actually enjoyed this web site. Very likely I’m want to bookmark your site . You amazingly come with amazing posts. Appreciate it for sharing your web site.
Hope you can help. I successfully installed arch linux on the device (v3) & usb drive. Then updated it to death, apparently wiping out some good things. It flashes green/orange, won’t boot, doesn’t respond to IP and therefore can’t be seen by a windows terminal app. Is it now just pretty pink junk?
Try loading up a linux live CD, such as ubuntu. insert the drive and load terminal. run fsck to check the drive.
https://my.hostmantis.com/aff.php?aff=246